
Batch Actions on photos and videos
Resize, crop, convert, adjust, watermark photos and trim, convert or turn videos into GIFs, many files at once, described in a sentence or built step by step.
The Mac App Store edition is coming soon. The website edition has everything. Compare the editions
Tools › Batch Actions (Photos and Videos)… ⇧⌘B applies a series of transformations to many photos and videos at once. The tab has three columns.
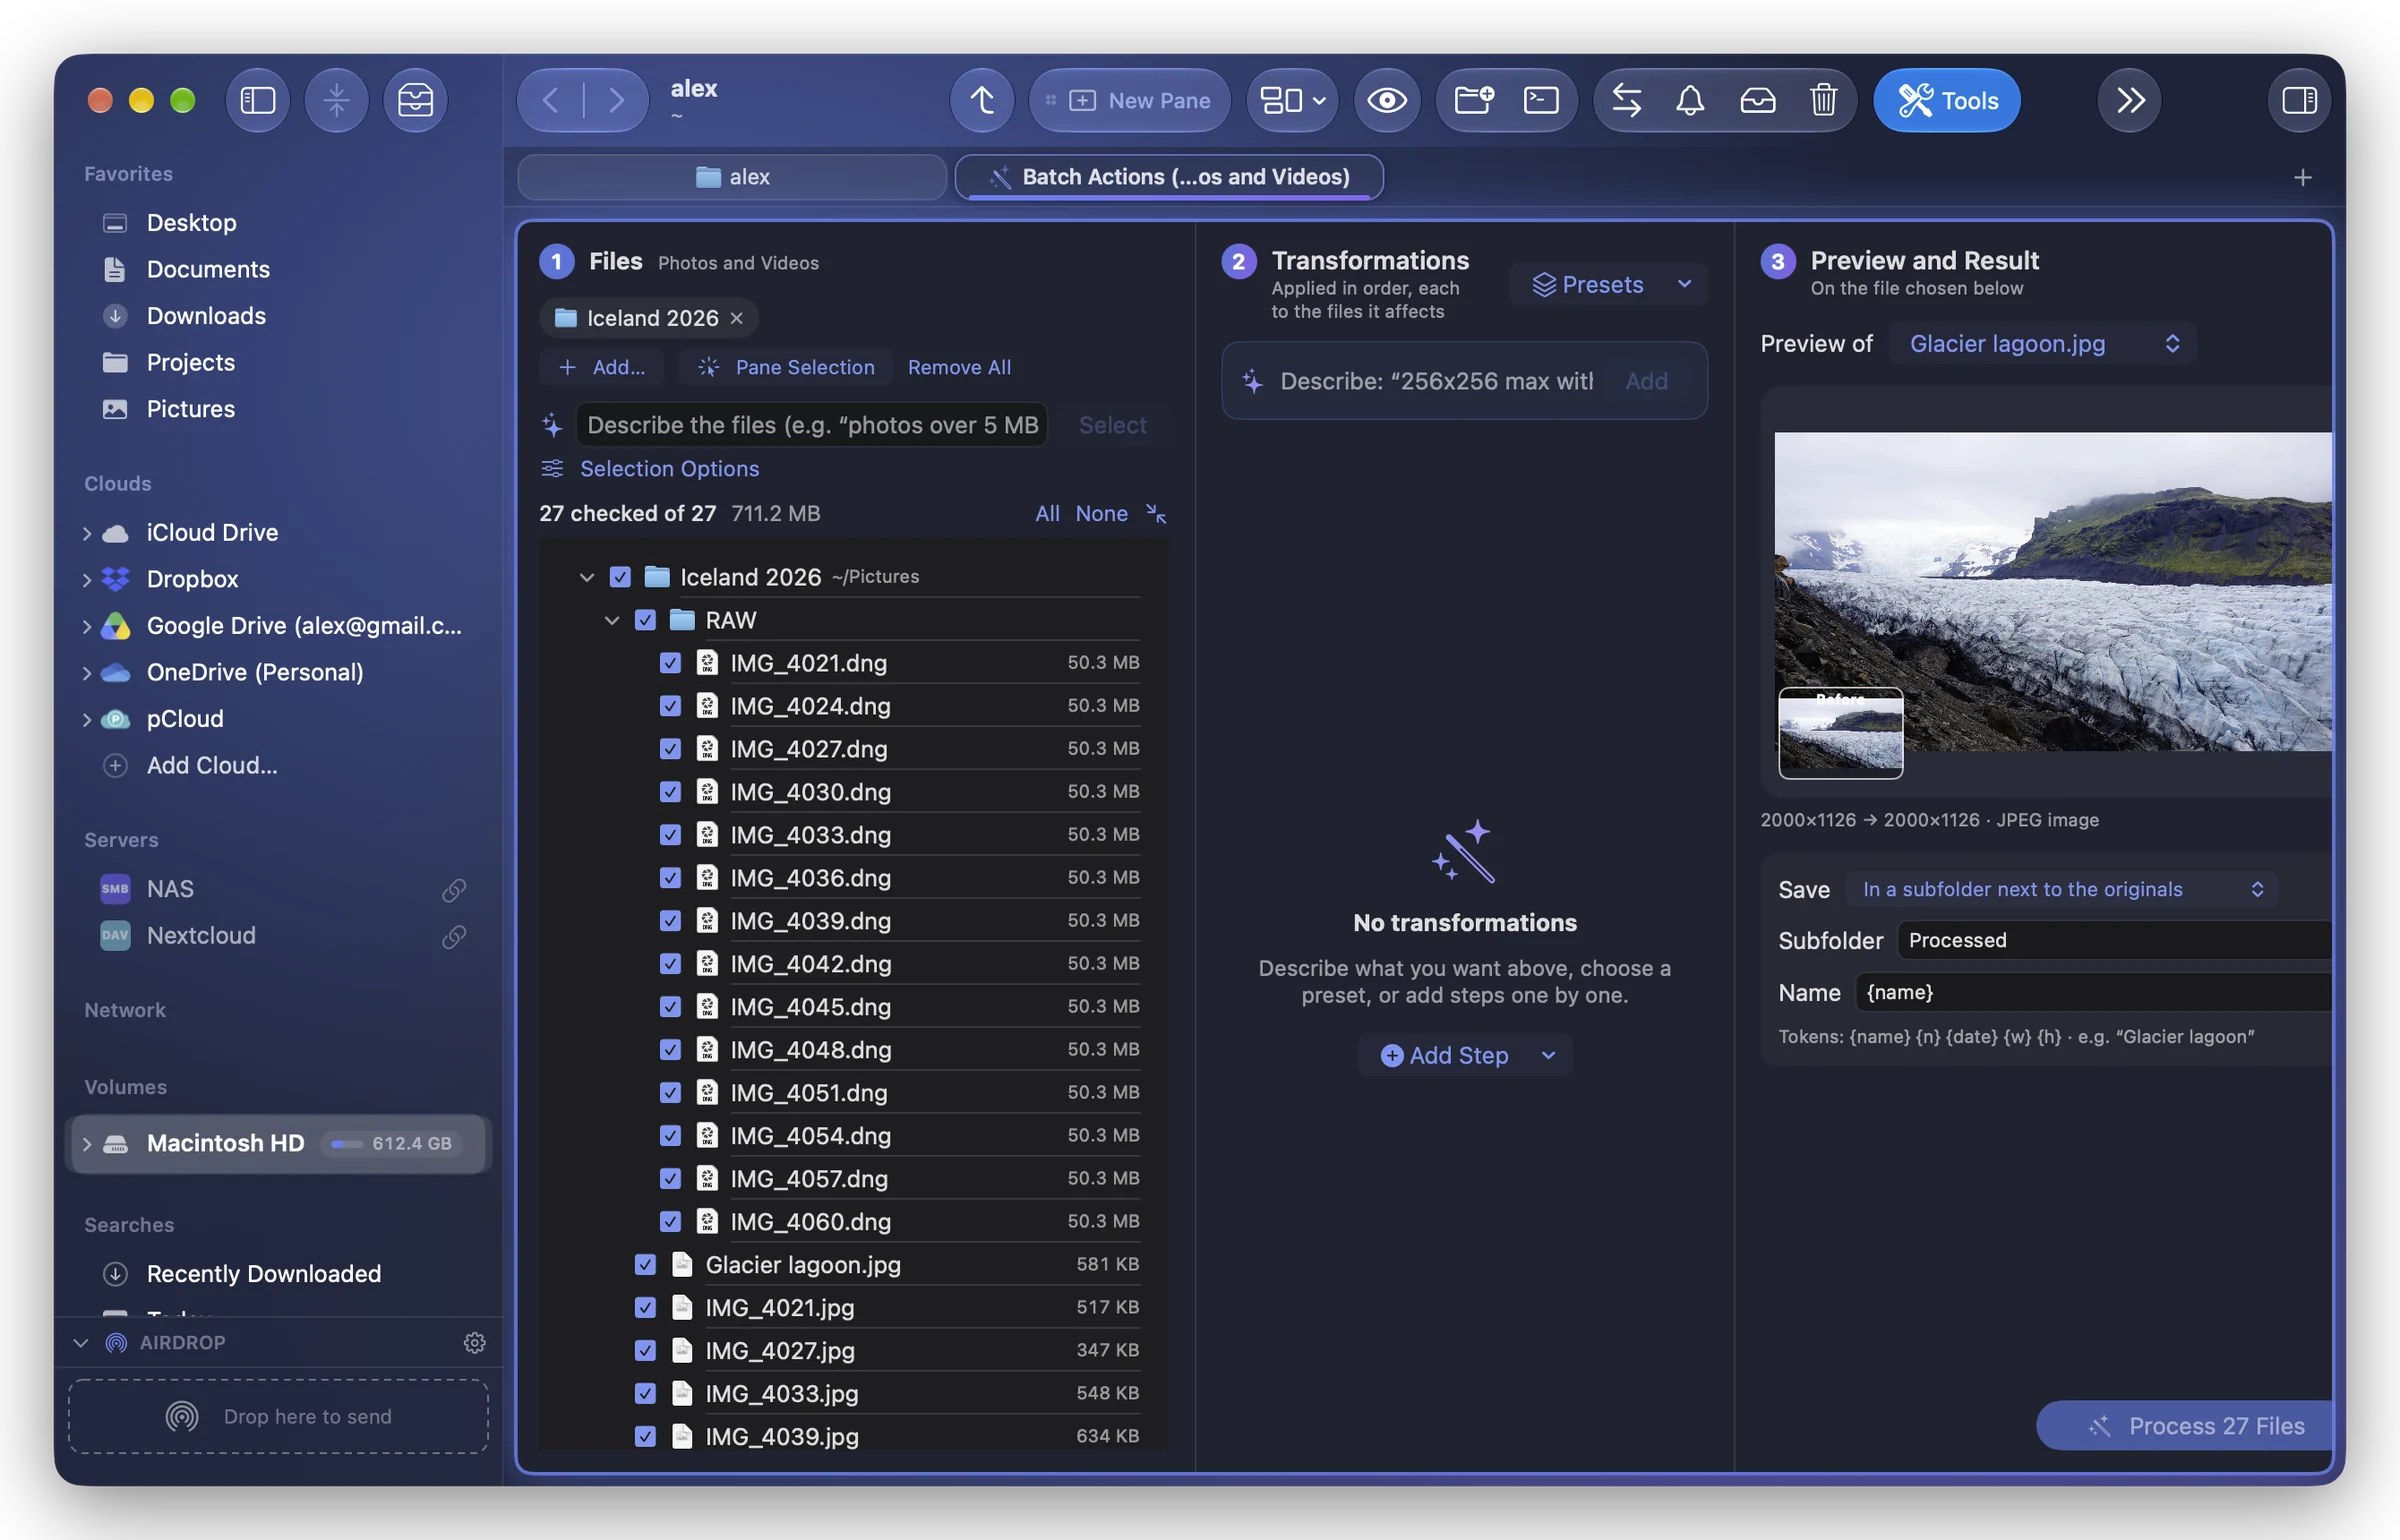
1. Photos and Videos
Add the files: drag them in, or select them in a pane and right-click › Batch Actions on Photos and Videos…. Untick the ones to leave out.
2. Transformations
Describe what you want in a sentence and click Add: « 1080x1080 cropped in the middle », « black and white », « trim the first 5 seconds », « as JPEG quality 80 ». Folia Files turns it into steps. Or click Add Step and choose them one by one.
Steps are applied in order, each to the files it concerns:
| For photos and videos | For photos | For videos |
|---|---|---|
| Resize (scale, sizes, enlarge smaller files or not) | Settings (exposure, brightness, contrast, saturation, temperature, sharpness) | Cut (keep or remove a part) |
| Crop to a ratio, anchored where you like | Looks: Auto Enhance, Black & White, Sepia, vivid colors, vignette, blur… | Speed (sped up or slow motion; the sound keeps its pitch) |
| Rotate / Flip | Watermark (text, corner, size, opacity) | Remove Audio, Frames per Second |
| Remove Location or Remove Metadata | Add Margins | Video Format (container, H.264 or HEVC, quality) |
| Photo Format (JPEG, PNG, HEIC, TIFF…, quality) | Extract Audio (M4A), Extract a Frame, Create Animated GIF |
Save as Preset… keeps the steps under a name; Presets brings them back.
3. Preview and Result
The preview shows the chosen file Before and after, with its new size. Below, Save decides where the results go:
- In a subfolder next to the originals (the default, named Processed);
- Next to the originals;
- In a chosen folder;
- Replace the originals (moved to Trash): each original goes to the Trash once its replacement is written.
Name sets the new files' names with tokens: {name} (the original name), {n} (a number), {date}, {w} and {h} (the width and height of the result).
Click Process … File(s). The progress shows in the tab and in the toolbar's Operations; Show Results opens them when it's done.