
PDF Tools
Combine PDFs and pictures into one PDF, reorder, rotate, remove, extract or split pages, compress, and make scans searchable; your originals never change.
The Mac App Store edition is coming soon. The website edition has everything. Compare the editions
On this page
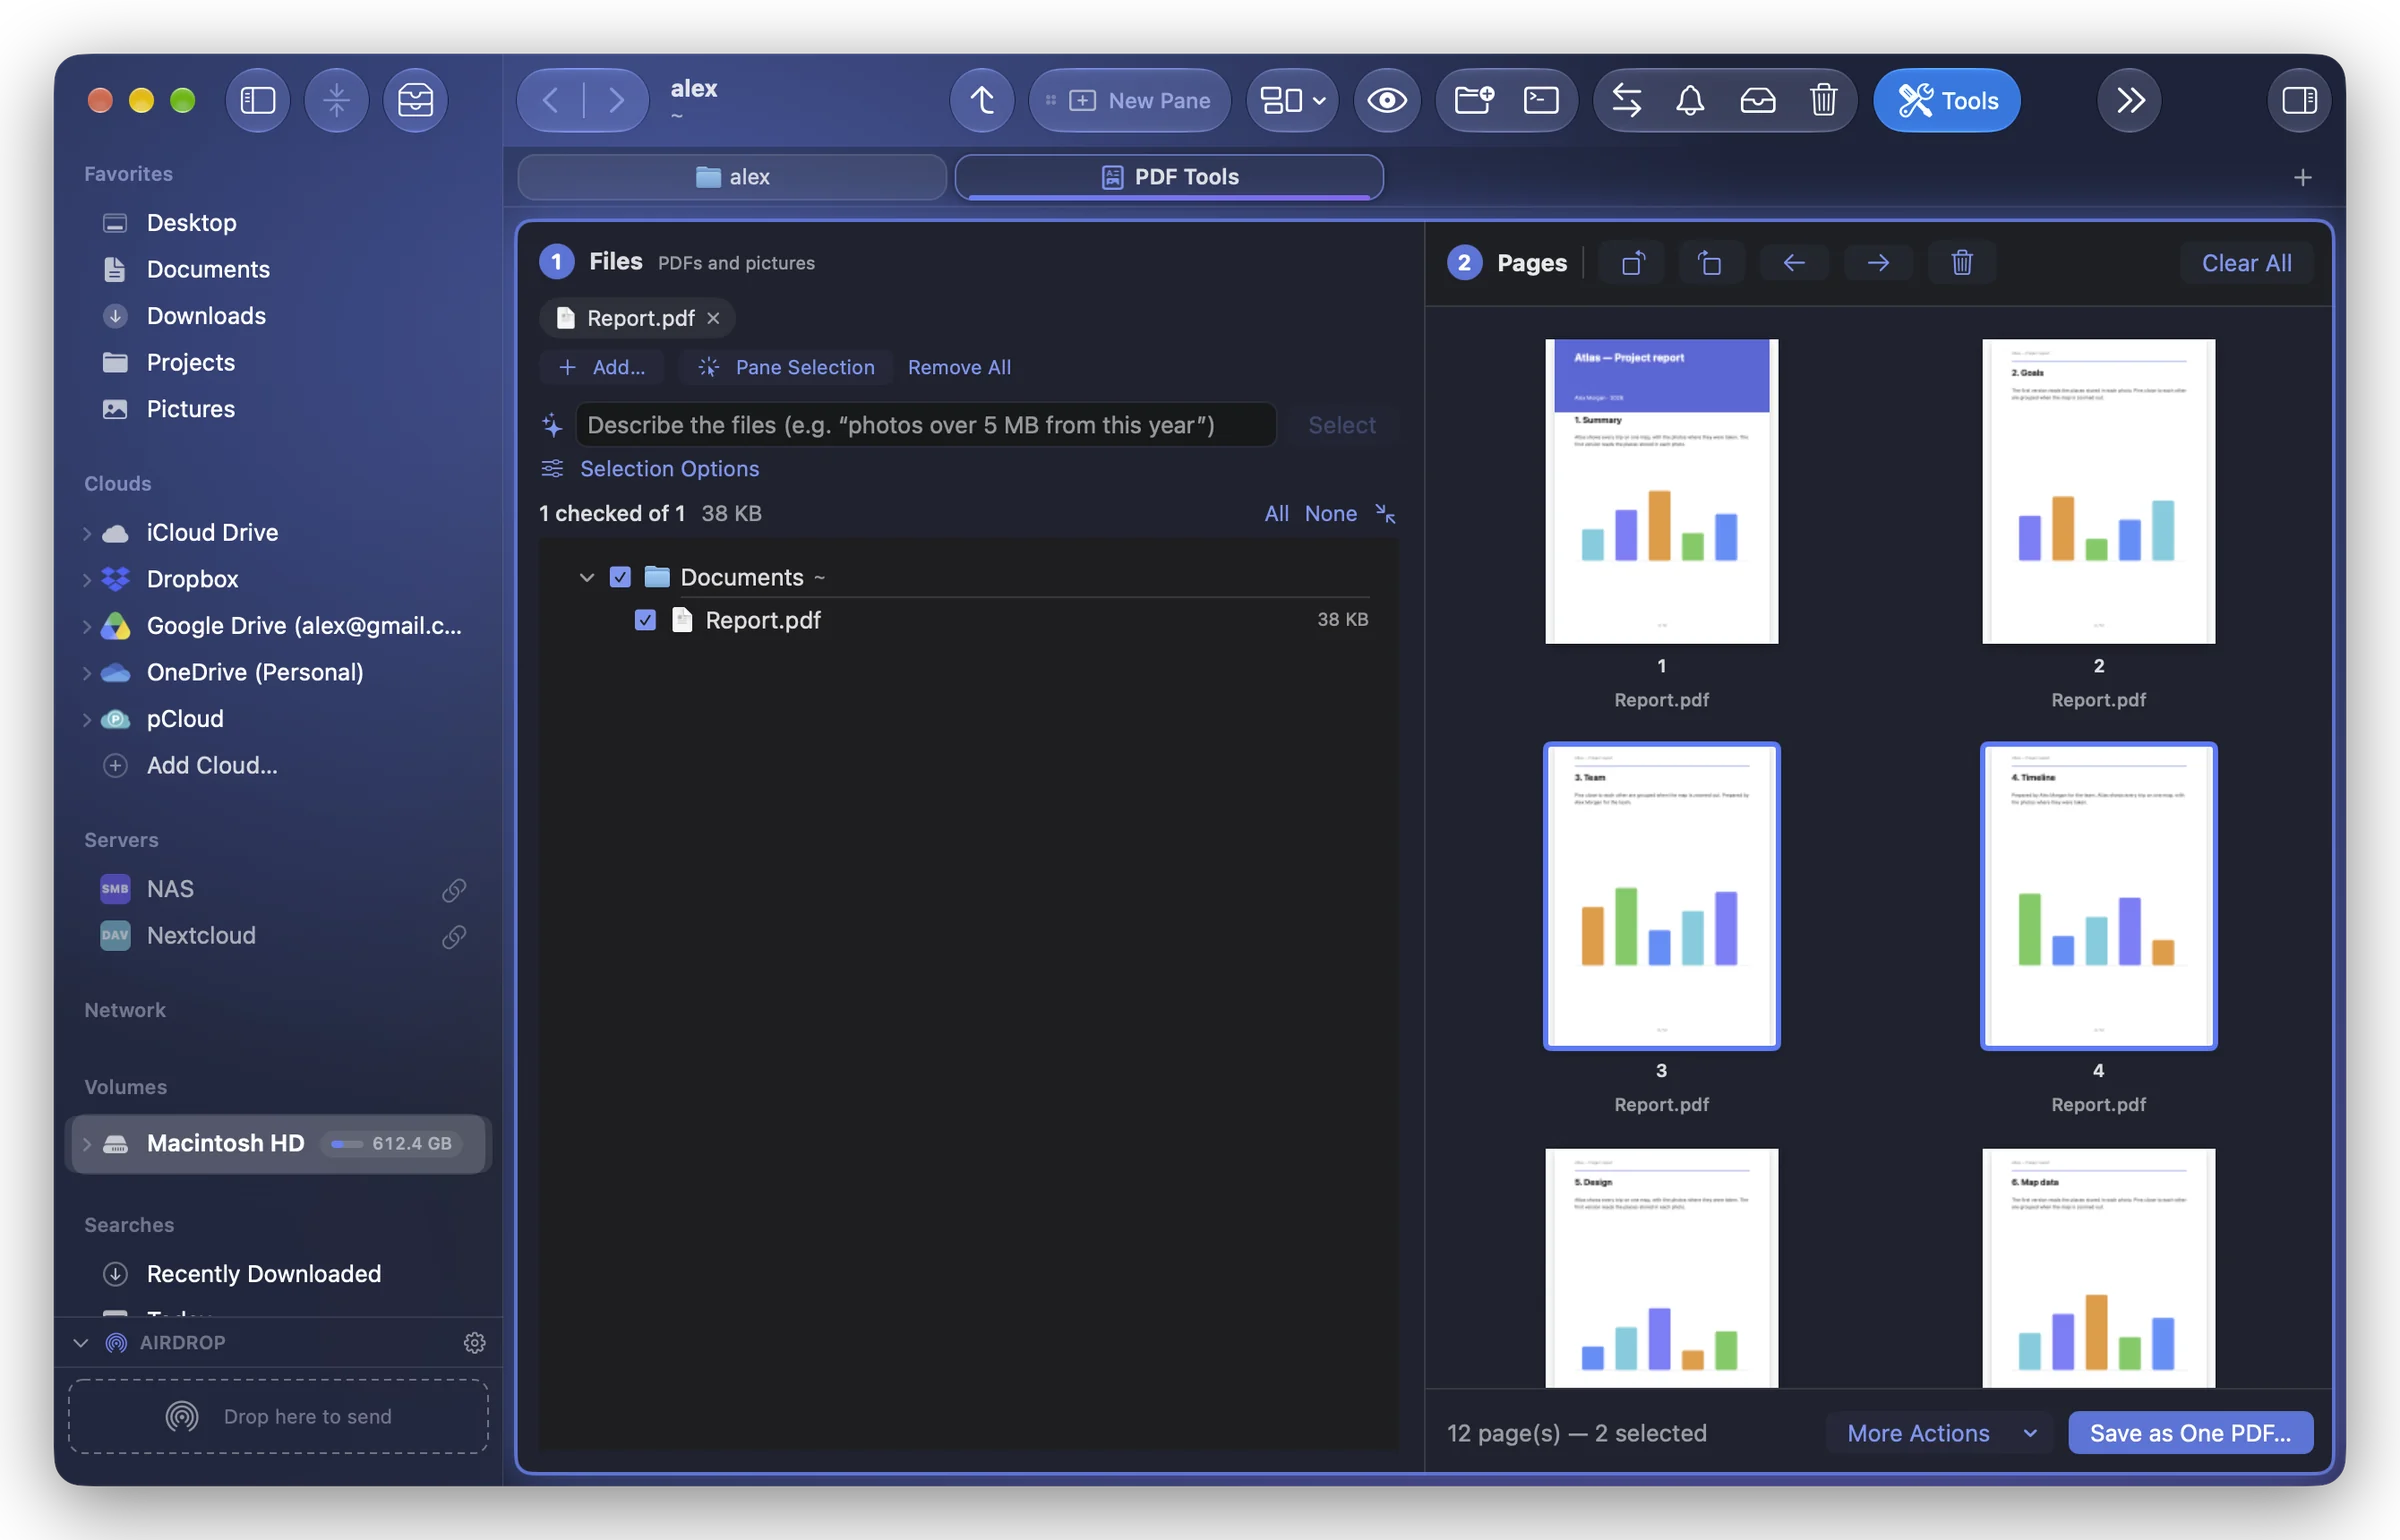
PDF Tools lays out the pages of PDFs and pictures side by side, so you can put a document together the way you want. It opens in a tab of the window.

Open it
- Select files, a PDF at least, and choose PDF Tools… in the context menu (or File › More Actions › PDF Tools…): they are already in, pictures selected with them included.
- Or choose Tools › PDF Tools…, or its card in the Tools tab. When it opens, it starts with the files selected in the active pane (the pane's folder when nothing is selected).
1. Choose the files
On the left, under Files, add folders or files with Add…, take the active pane's selection with Pane Selection, or drag them there. Their PDFs and pictures (JPEG, PNG, HEIC…) are listed, ticked. You can also describe them in words (« PDFs from this week ») and click Select. Files dropped onto the pages are added too.
The pages of the ticked files appear on the right, in order. A picture becomes one page, at its own size and orientation. A password-protected PDF can't be read: the bar at the bottom says so.
Unticking a file takes its pages away; ticking a new one adds its pages at the end. The order, rotations and removals you chose for the others stay. The pages of 400 files at most are shown at a time: untick some to see the others.
2. Arrange the pages
Click a page to select it, ⌘-click to add or remove one, ⇧-click to select every page from the last one clicked. Then, with the buttons above the pages:
- Rotate Left, Rotate Right (with no page selected, they turn every page);
- Move Selection Earlier, Move Selection Later (the arrows), one place at a time;
- the Trash button, Remove selected pages (the files aren't modified): the pages leave this list only;
- Clear All to start over.
3. Make the result
The buttons at the bottom. When the tab is narrow, all but Save as One PDF… go into More Actions.
| Button | What it makes |
|---|---|
| Save as One PDF… (⌘S) | all the pages, in this order, in one PDF ("name (combined).pdf" when several files went in) |
| Extract Selection… | a PDF of the selected pages only ("name (extracted).pdf") |
| Split into Pages | one PDF per page, numbered, in a new folder "name (pages)" next to the first document |
| Compress… | a lighter copy: the same pages with their pictures recompressed for the screen ("name (compressed).pdf"); the sizes before and after are shown |
| Make Searchable (OCR)… | the text of scanned pages recognized on your Mac and added, invisible, at its place ("name (searchable).pdf") |
For every result but Split into Pages, a dialog asks where to save, in the first document's folder at first. If you choose to replace an existing file, the old one goes to the Trash. The result is then shown in the active pane.
Each new file (or the folder of a split) has its entry in Operations › History: undo it there and it goes to the Trash.
Make scans searchable
Make Searchable (OCR)… reads the text of the pages that have none (scans, photos of documents) on this Mac and adds it, invisible, at its place under each line. Pages that already contain text keep it as it is. You can then select, copy and search the text of the new PDF, with Spotlight and Folia Files' search too; the bar at the bottom says how many characters were recognized.
The language is detected by itself, line by line: English, French, Arabic, Japanese, Chinese…
Good to know
- Compress… helps most with scans and photos; a PDF made of text is already small.
- To turn a Markdown document into a PDF, open it in Folia's text editor or right-click it › Convert to PDF.